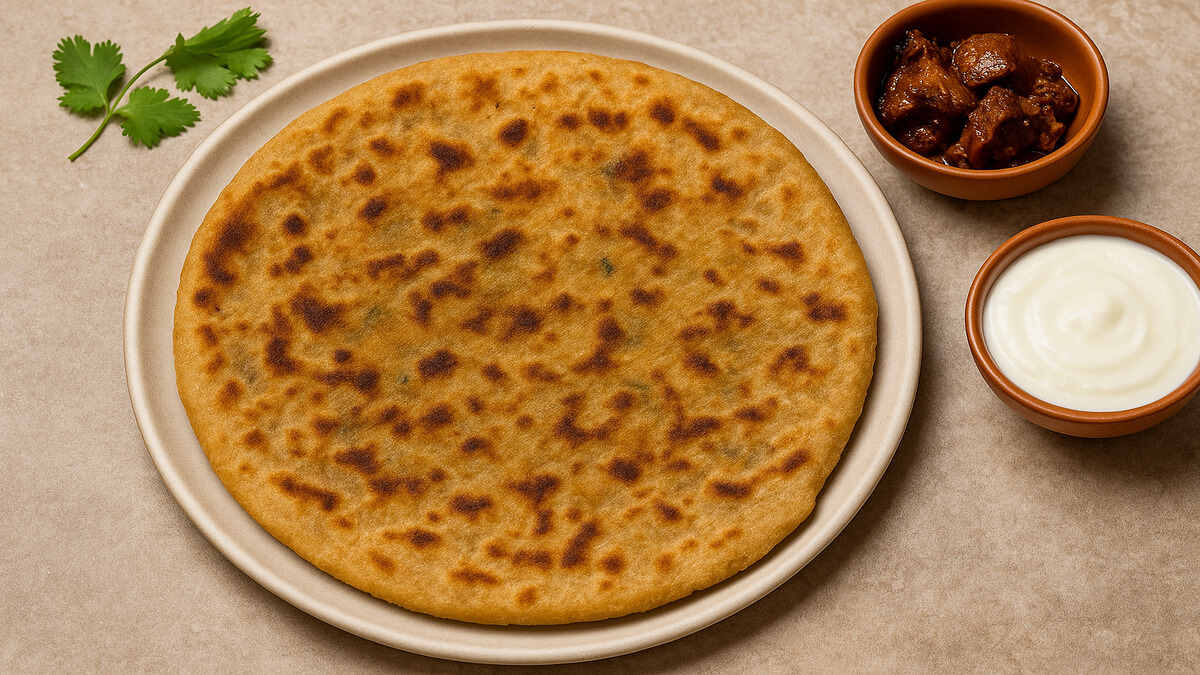
Hello my friend… hope your day’s going well. Today, let’s talk about one of those foods that feels like a warm hug — Aloo Paratha Recipe. I mean, who doesn’t love it? Soft wheat bread filled with spiced potatoes, crisp on the outside, fluffy inside… and when you add a bit of butter on top — trust me — life suddenly feels better.
I’ll walk you through everything: the ingredients, stuffing, dough, cooking, variations, health benefits, a little nutrition info, FAQs… and some personal asides in between because well… that’s how real cooking conversations work.
So friend, let’s roll into it — literally.
Ingredients
Equipment
Method
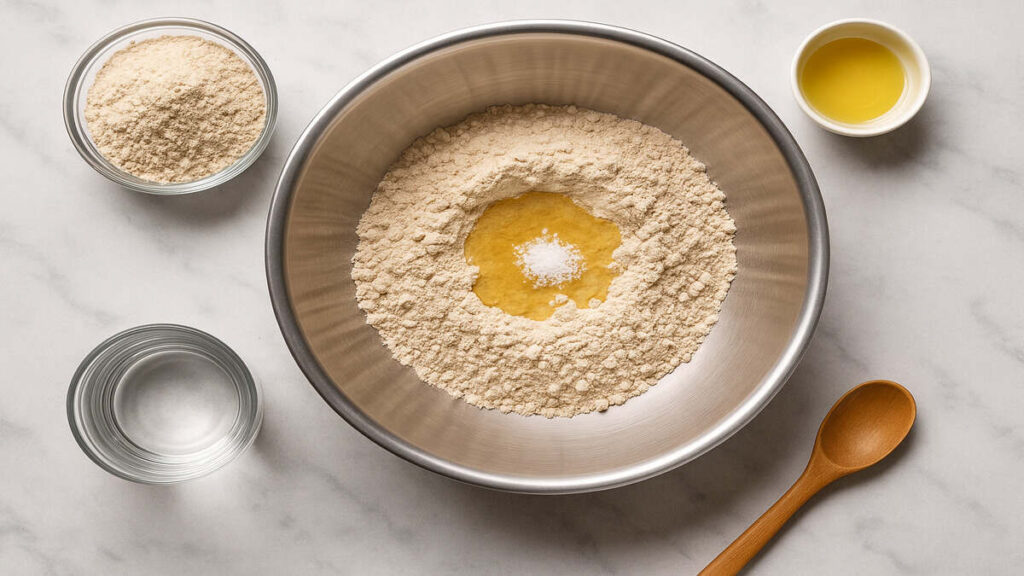
- Add flour, salt, and oil in a mixing bowl.
- Add water slowly and knead into a soft, smooth dough.
- Cover and rest for 10–15 minutes.
- Mash boiled potatoes well.
- Add green chillies, coriander, and all spices.
- Mix properly and taste for salt.
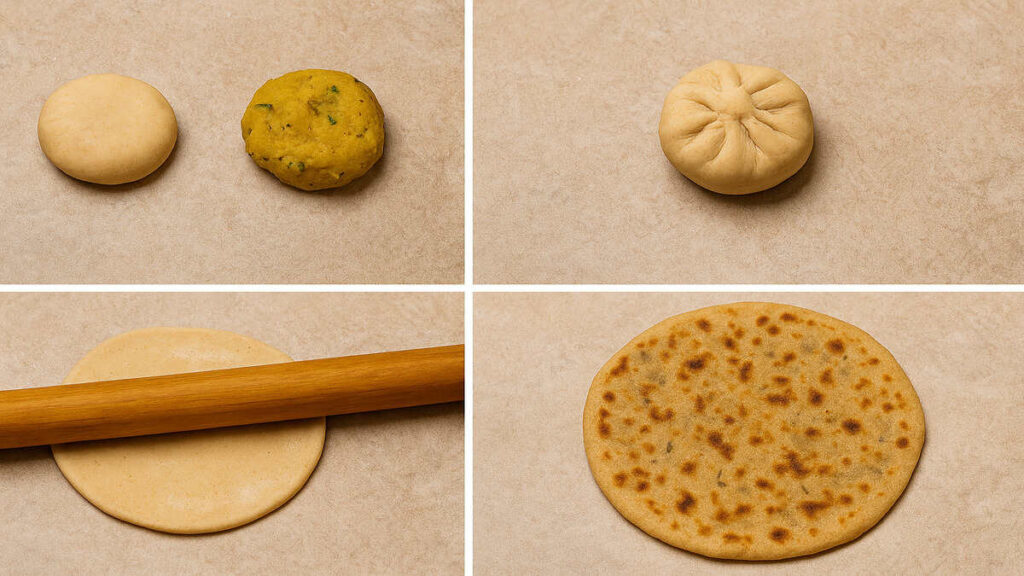
- Divide the dough into balls.
- Roll a small circle, place stuffing inside, seal edges.
- Roll gently into a round paratha (7–8 inches).
- Heat tawa on medium flame.
- Place the paratha and cook until bubbles appear.
- Flip and apply ghee on both sides.
- Cook until golden brown spots appear.
Notes
The ingredients are simple, the method looks long, but once you do it — you’ll realise it’s actually easy. And honestly, nothing beats the smell of a hot paratha in the morning. So the next time you’re craving something warm and homemade, trust me, just make this. Your kitchen will smell amazing, your mood will improve, and whoever tastes it will probably say, “Wow, you made this?”
Introduction — Why Aloo Paratha Feels Like Home
If you grew up in India, there’s a good chance your morning smelled like hot parathas. Maybe your mom rolled them so fast you blinked and missed one. Maybe you burnt your hand once trying to steal a piece. Or maybe you’re making it for the first time — which is exciting, because you’re about to create something comforting with very simple things.
I always say this: Aloo Paratha isn’t fancy food. It’s simple, filling, and full of heart. And the funniest thing? Even though the recipe looks easy on paper, every home cooks it a little differently. Some add more spices, some add more ghee, some keep it mild… and some (like me) sometimes mess up the first one because the stuffing slips out — happens to everyone.
So brother, let’s know something more interesting…
Do you know the magic of a good aloo paratha actually lies in balance? Not too soft dough, not too stiff. Not too watery stuffing, not too dry. Once you get that balance — you’ll be making perfect parathas even half-asleep on a Sunday morning.
Alright, enough talk. Let’s start cooking.
Equipment You’ll Need
Honestly, nothing fancy. Just your everyday kitchen stuff:
- A mixing bowl
- Rolling board + rolling pin
- A flat pan or tawa
- Potato masher or fork
- Small plate for dusting flour
- A spatula
- A small bowl for ghee or oil
- Optional: a sieve if you want very fine atta
That’s it. Most Indian homes already have all of this.
Aloo Paratha Recipe Ingredients (For 6–8 Parathas)
For the Dough
- 2 cups whole wheat flour (atta)
- 1 tbsp oil
- Water (as needed — around ¾ cup, but don’t measure too hard)
- A pinch of salt
For the Aloo Stuffing
- 4 medium potatoes (boiled and mashed)
- 1–2 green chillies (finely chopped)
- 1 tbsp coriander leaves
- ½ tsp red chilli powder
- ½ tsp jeera
- ½ tsp garam masala
- ½ tsp chaat masala (optional but tasty)
- ½ tsp amchur (dry mango powder — adds magic)
- Salt as per taste
For Cooking
- Ghee or oil (ghee is traditional… and honestly tastier)
How to Make Aloo Paratha – Step-by-Step (Friendly Kitchen Flow)
I’m going to explain this like we’re standing in the same kitchen — not like a school textbook. So yes, there may be tiny random pauses or “trust me” moments.
1. Make the Dough (Don’t Overthink It)
Take the atta in a big bowl. Add salt and one spoon of oil. Mix it with your fingers first — kind of like giving the flour a warm-up.
Now start adding water slowly. And I mean slowly… because if you add too much in one go, well, you know the pain of sticky dough.
You want a soft but non-sticky dough. Something that feels like your earlobe when poked.
Knead for 5–7 minutes, cover it, and let it rest for 10–15 minutes.
This rest time actually helps the gluten relax, making rolling easier.
(Trust me, skipping this step will make your parathas feel stubborn.)
2. Prepare the Stuffing (The Hero of the Dish)
Boil the potatoes until soft. Peel them when warm — not cold, not hot enough to burn.
Mash them really well. Any lumps can tear your paratha later, and then… stuffing everywhere.
Add all your spices: chilli powder, jeera, garam masala, chaat masala, amchur, green chillies, coriander, and salt.
Now taste a pinch. Yes, taste it.
Stuffing is the soul — if the stuffing isn’t delicious, the paratha won’t be.
Add salt if needed. Maybe a pinch more amchur if you want that little tangy kick.
Some people add onions here — I sometimes do too — but that’s totally optional.
3. Rolling Time (The Fun + Slightly Scary Part)
Okay, let’s roll.
Pinch a lemon-sized ball of dough. Flatten it slightly and dip it in dry atta.
Roll it into a small circle — maybe 4 inches.
Place a ball of aloo stuffing in the middle. Not too much, not too little.
Bring the edges of the dough toward the center — like you’re closing a dumpling.
Seal it properly. Give it a gentle press.
And now… roll it slowly. Very slowly.
If stuffing tries to escape — don’t panic — it happens. Just pinch the tear and dust with a little atta.
Roll until it becomes roughly 7–8 inches wide.
4. Cooking the Paratha (Smell Incoming…)
Heat the tawa on medium.
Place the paratha gently on the hot surface.
Wait until you see small bubbles. Flip.
Now add a teaspoon of ghee. Spread it around with the spatula.
Flip again. Add a little more ghee.
Cook until golden brown spots appear. The paratha should look crisp but soft.
You’ll know it’s perfect when it puffs up slightly. That’s your victory mome.
READ MORE CECIPE: Khichdi Recipe – Simple, Healthy & Comforting One-Pot Meal
Variations — Because Aloo Paratha Is Never Boring
So friend, let’s know something more interesting…
Do you know Aloo Paratha has so many variations that you could honestly eat a different version every day of the week?
Here are a few:
1. Paneer-Aloo Paratha
Mix grated paneer with the stuffing for a softer, richer taste.
2. Cheese Aloo Paratha
Kids love this — add mozzarella inside. Sounds weird but… tastes heavenly.
3. Spicy Dhaba-Style Aloo Paratha
Extra green chillies, extra amchur, extra ghee.
Basically… extra everything.
4. Onion-Aloo Paratha
Add finely chopped onions. Gives a sweet crunch.
5. Garlic-Aloo Paratha
Mashed potato + crushed garlic = bold flavor.
6. Aloo Methi Paratha
Add fresh fenugreek leaves to the dough — super fragrant.
Health Benefits — Yes, Aloo Paratha Can Be Healthy
People think parathas are “heavy”. Honestly… anything becomes unhealthy if you overload or eat five at once.
But one or two well-made parathas?
Actually pretty balanced.
- Carbs from wheat + potatoes = energy
- Fiber from whole wheat
- Healthy fats from ghee (if used carefully)
- Vitamins from potatoes
- Protein increases if you add paneer or curd on the side
- Keeps you full for many hours
If you’re health-focused:
- Use less ghee
- Add more vegetables in the stuffing
- Pair it with curd or homemade pickle rather than heavy butter
Nutrition (Per One Medium Aloo Paratha)
Approximate values
- Calories: ~230–260
- Carbs: 35–38g
- Protein: 4–6g
- Fat: 8–10g
- Fiber: 3–4g
Not bad for something so comforting.
FAQs – Aloo Paratha
1. Why does my paratha tear while rolling?
Usually because the stuffing isn’t mashed enough or you added too much stuffing.
2. How to make soft Aloo Parathas?
Use a soft dough, avoid over-roasting, and let the dough rest before rolling.
3. Can I make the stuffing ahead of time?
Yes, totally. Just don’t refrigerate too long — use within a day for best flavor.
4. Which flour is best for parathas?
Whole wheat atta gives the best texture. Avoid refined flour.
5. Can I cook Aloo Parathas without ghee?
Yes, use oil… but honestly, ghee gives the real flavour.
6. Why does my paratha become chewy?
Too much flour while rolling or cooking on too low heat.
7. How to store leftover parathas?
Wrap them in foil or cloth and refrigerate. Reheat on tawa.
8. What to serve with Aloo Paratha?
Curd, butter, pickle, chutney — whatever you love.
9. Can beginners make this easily?
Of course. You may ruin the first one… everybody does.
10. Is Aloo Paratha good for breakfast?
Yes — it keeps you full and energetic for hours.
Conclusion — A Simple Dish With a Big Heart
Aloo Paratha isn’t just food… it’s comfort, nostalgia, and pure satisfaction.
The ingredients are simple, the method looks long, but once you do it — you’ll realise it’s actually easy. And honestly, nothing beats the smell of a hot paratha in the morning.
So the next time you’re craving something warm and homemade, trust me, just make this. Your kitchen will smell amazing, your mood will improve, and whoever tastes it will probably say, “Wow, you made this?”
And you’ll just smile.